Friday, April 6, 2012

Nuetral and Solids Swap - Sign Ups Now Live!

UPDATE: 
The 28 guaranteed spots are now full. But go ahead and sign up to be put on our waiting list - if we reach 56 by April 15th, we can double our variety!! Spread the word!
__________________________
It's official! 
I present to you...


Each person will purchase 2 yards of fabric (1 yard neutral, 1 yard solid) and cut them into 5" charm squares. 1 yard = 56 charms.  (I recommend buying 1.25 yards- never hurts to have a little extra in case you make a cutting mistake.) 

The first 28 people to sign up will be guaranteed a spot (you must fill out the form, comments will not count). After that I will start a waiting list and if we reach 56 by April 15th , we will do 56 participants. 
This will be open to U.S. swappers only this round. Sorry! This is my first swap, so cross your fingers, if it goes well I will do a second round and open it to international swappers!
Wanna Sign up?  HERE is the form.  


 Wondering what sort of fabulous fabrics we'll get back?

Here are some examples of fabrics that would be great 'neutrals'


Here's some 'solid' eye candy ;)


Are you wondering what you can do with this lovelies? Here's what I am inspired by:

1. Improv circles pillow by stitchindye on Flickr 2. PTS7 in progress! by BlueElephantStitches on Flickr 3. Solids Swap package finished by Sarah @ FairyFace Designs on Flickr 4. the big orange wall quilt by Spotted Stone Studio {Krista} on Flickr 5. gelato circles by alobsiger on Flickr 6. YIP 365.230:: Windmill mini by stitchindye on Flickr
Aren't you drooling? I am!


Can't resist? Secure your spot in the swap HERE

___
Here are the particulars

Mailing deadline will be May 25th 2012. This gives you little more than a month, since lots of families are traveling for Easter and Spring Breaks.


 Fabric requirements (as written by the wonderful :
  1. Choose a fabric that has a small print suitable for an 5" charms. Scale of the print is very important as smaller works better in this case. A larger print has a larger repeat and you want each charm to have enough of the print showcased on each piece.
  2. Fabric should be designer label, 100% cotton, quilt shop quality fabric.  No Hancocks, Joanns or Michael's fabrics. For a fabric swap, the fun is receiving quality fabric that you might not be able to pick up around the corner.  *The exception to this is Kona Cotton Solids which can be purchased from Joanns, just check the end of the bolt to make sure it says Kona Cotton.
  3. Fabric must be new and unwashed and must come from a smoke free environment.
  4. Before mailing, cut your fabric into 5" x 5" charm squares.  Press your fabric before cutting. 1 yard = 56 charm squares (5" x 5".)  Here's a great tutorial on how to cut fabric into charms by Elizabeth Hartman.
  5. Put your fabric in a ziplock bag and include an index card with your name and email address. 
  6. Upload pictures of your fabric to the swap Flickr group and include the name of the fabric, designer, etc. This ensures that there are no duplicate fabrics chosen and allows everyone to find out more about the fabrics in case they would like to order more once they have received their charms. 


Thursday, April 5, 2012

New Charm Swap: Neutral and Solids Charm Swap!

Update:  THIS SWAP IS NOW FULL! 
---------------
I love charm swaps, recently there have been some awesome rainbow charm swaps. 
Now though, my stash is so very low on neutrals and solids.

Turns out I'm not the only one.  
Since I'm feeling up for an adventure and there was a great response to the idea. I present to you...


Sign Ups will go live on this blog 12 noon EST on Friday, April 6th, 2012.

The first 28 people to sign up will be guaranteed a spot (you must fill out the form, comments will not count). After that I will start a waiting list and if we reach 56 by April 15th , we will do 56 participants. 
This will be open to U.S. swappers only this round. Sorry! This is my first swap, so cross your fingers, if it goes well I will do a second round and open it to international swappers!
Mailing deadline will be May 25th 2012. This gives you little more than a month, since lots of families are traveling for Easter and Spring Breaks.

 Fabric requirements (as written by the wonderful :
  1.  Each person will purchase 2 yards of fabric (1 yard neutral, 1 yard solid) and cut them into 5" charm squares. 1 yard = 56 charms.  (I recommend buying 1.25 yards- never hurts to have a little extra in case you make a cutting mistake.) 
  2. Choose a fabric that has a small print suitable for an 5" charms. Scale of the print is very important as smaller works better in this case. A larger print has a larger repeat and you want each charm to have enough of the print showcased on each piece.
  3. Fabric should be designer label, 100% cotton, quilt shop quality fabric.  No Hancocks, Joanns or Michael's fabrics. For a fabric swap, the fun is receiving quality fabric that you might not be able to pick up around the corner.  *The exception to this is Kona Cotton Solids which can be purchased from Joanns, just check the end of the bolt to make sure it says Kona Cotton.
  4. Fabric must be new and unwashed and must come from a smoke free environment.
  5. Before mailing, cut your fabric into 5" x 5" charm squares.  Press your fabric before cutting. 1 yard = 56 charm squares (5" x 5".)  Here's a great tutorial on how to cut fabric into charms by Elizabeth Hartman.
  6. Put your fabric in a ziplock bag and include an index card with your name and email address. 
  7. Upload pictures of your fabric to the swap Flickr group and include the name of the fabric, designer, etc. This ensures that there are no duplicate fabrics chosen and allows everyone to find out more about the fabrics in case they would like to order more once they have received their charms.
    Still interested? Awesome! I'd love to have ya!
Check back here for the SIGN UP FORM, after NOON on Friday April 6th!

Neutral and Solid swap. weigh in!

Hey lovelies!

I am loving all of these rainbow swaps! I know you are too.

I am totally lacking coordinating solids though, and neutrals. This made me think.

I don't see many swaps for these, but they can be really useful and striking. See?


Solids Swap package finished by Sarah @ FairyFace Designs
pouches by Sarah @ fairyface designs

YIP 365.230 :: Windmill mini by stitchindye
wall hanging by malka at stitchindye

SO, since I'm feeling spunky and up for an adventure, I am thinking of hosting a swap 
(similar to the usual 28 or 56 person format).

Would this be something you'd like? No commitment here, just gauging interest. 

Sunday, March 18, 2012

Tutorial: Bee Simple Block


You probably already know this, but online quilting bees are alot of fun. You get to try a bunch of different blocks, new techniques, meet new people, the works.   

One of the parts that I get so excited about is choosing a block for my bee-mates to sew.

I am always looking for blocks that are easy to cut in advance and are beginner friendly


This block fits the bill. 

Sure, it looks pretty tame.  But check out the digital quilt Sandy Kayser made from it.

Cool right?
Simple, modern, and looks harder than it is. Love it.

Wanna make one yourself? 
Or, better yet, wanna get your bee to make some for you? 

Here are the particulars-

I always give credit to where it is due- so you should know that this block is originally from a pattern from Quilt magazine June/July 2011 page 45, Deep Blue Seas by Nancy Rink. I am not taking credit for the block design. This tutorial is meant to be a helpful reference if you are making this block for personal use/bees. Because, let's face it. Most of us ignore the text directions and just look for photos anyway, right?
 

Materials:  For one 9” block (9.5” unfinished) 

 
1.      Place one Color 1 3x3” square and the Color 2 3x3” square right sides together. Line up edges.

2.      Sew along one edge, using a scant ¼” seam. (I recommend sewing off of a scrap, so that stitches on the edge don’t come loose)

 3.      Press the seam open.


 4.      Place the second Color 1 3x3” square right sides together to the Color 2 3x3” square. 
Line up edges.
*NOTE: If you are using a directional print, make sure the direction is the same on both sides

5.      Sew along one edge, using a scant ¼” seam. Press the seam open (not pictured). This is the center of the block.


6.      Place one of the long (3x8”) Color 1 pieces right sides together on to the pieced center.

7.      Sew along one edge, using a scant ¼” seam.

8.      Press the seam open.


 9.      You know what to do! Place the second long (3x8”) Color 1 piece right side together. 

10.  Sew along the edge using a scant ¼” seam (not pictured).  Press the seam open. You’re almost done!


11.  Now if you have been using a good scant ¼” seam you will have a little trimming to do before the last steps. We will be trimming to a perfect 8” square. This just makes it nice and neat in the end, and easier to add the sashing.  If you have used closer to a true ¼” seam, it should be exactly 8” square, and you can go to the next step.

To square my block to 8”, I place an 8.5” or 12.5” ruler on the block. Then Iine up the corner of the center square to near 2.75” and 5.25” along the diagonal (red arrows).  You can fudge it one way or the other to make sure you have at least 8” each direction, but this gives you a guide as far as where ‘center’ is.


12.  Sew the 2x8” sashing strip along the top (not along the long strip) using a scant ¼” seam.

13.  Press seam open


14.  Sew the 2x9.5” sashing strip along the side (along the long color 1 strip), using a scant ¼” seam.

15.  Press seam open

Flip you block over to the front, and enjoy your modern simple block!


Happy Sewing!


Wednesday, February 29, 2012

asterisk gone wrong (aka keeping it real)


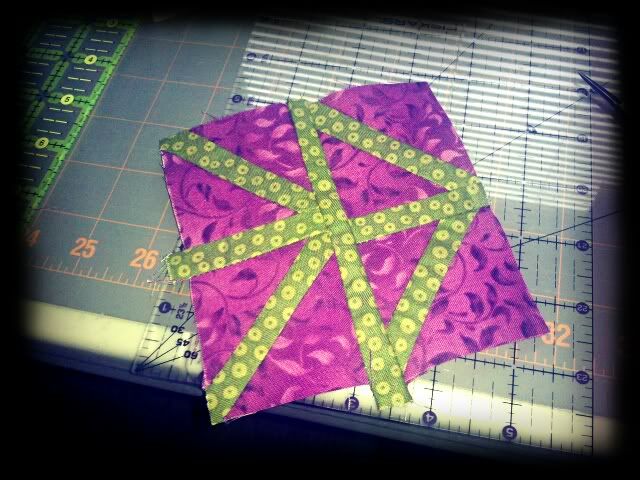
and this my dear friends, is why sewing an asterisk block while watching tv is a bad life choice...

time to do some 'unsewing'....

Wednesday, February 15, 2012

WIP Wednesday (2/15/12)

This will be a quickie WIP update - I've gotten alot done, but I don't have much time to tell you about it right now. 
Here are some photos to show you what's been going on behind the scenes here.

Photobucket

I got the Mini Quilt clipped and read to be bound. Here are some wonky houses and itty bitty circles .
You'll get to see more of when it's done
a little village

itty bitty circles


Moody Blues Bee/Dead Simple QAL Working on my layout now - the ladies from the MBB did a fantastic job with improv piecing!(no pics of this yet) ... 

and got I got 2 blocks made for Melissa, who asked for wonky stars in aqua and red.
Moody Blues Blocks February - Red and Aqua Wonky Stars


I got a log cabin pumpkin done for Lisa OYG February Block

OYG February Applique Closeup


I took part in the OYGB orphan bock challenge- from oprhan to tea wallet, in less than an hour!
Adopted blockTea Wallet (front)Tea Wallet (inside)


pins & bobbins 
Stalled out on this one, I have to find space to do the piecing , here are the 4 quadrants to the center square.
MIC Center Square - 4th Quarter

MIC Center Square - 3rd Quarter

MIC Center Square - 2nd Quarter

MIC Center Square - 1st Quarter

...and off I go to the next appointment. What a whirlwind of a Wednesday!

As usual you should check out every one's works in progress at Lee's!
WIP Wednesday at Freshly Pieced

Thursday, February 2, 2012

Dear February. I will own you.

Two days into the new month, I am kicking butt and taking names. 

I got this bee block (for the Stash Bee) done last night and I love it. 

Mika asked us to make an 8.5" block in one color so she can make a scrappy rainbow quilt.


Stash Bee (Hive #2 - February) Color Block 

This was a quick easy block to piece, but I love the result!
(It took longer for me to pick out the scraps last night, than to put it together)

Stash Bee (Hive #2 -February) Signature Block


Got the Signature Block done this morning.

I wasted NO time getting it off of the mountain pile I have on my sewing table.
They went in the mail this afternoon, and will be at it's new home on Monday!


Hope you like it Mika :)

Bam. Bring it on February!